Hyundai Ioniq (AE): Rear Door / Rear Door Belt Inside Weatherstrip. Repair procedures
Hyundai Ioniq (AE) 2017-2022 Service & Repair Manual / Body (Interior and Exterior) / Rear Door / Rear Door Belt Inside Weatherstrip. Repair procedures
| Replacement |
| 1. | Remove the rear door trim. (Refer to Rear Door - "Rear Door Trim") |
| 2. | Remove the rear door belt inside weatherstrip (A).
|
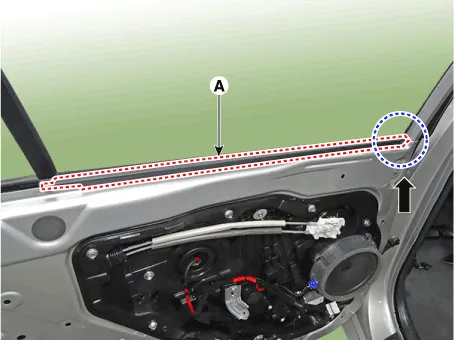
| 3. | To install, reverse the removal procedure.
|

Replacement1.Pull down the rear door window glass to the lowest level by pressing the power window glass switch.2.After loosening the mounting screws, remove the rear door belt outside weatherstrip (A).
Replacement[Rear door side weatherstrip]1.Loosen the rear door checker (B) mounting bolt. Tightening torque : 16.7 - 21.6 N.m (1.7 - 2.
Other information:
Hyundai Ioniq (AE) 2017-2022 Service & Repair Manual: Mode Control Actuator. Description and operation
DescriptionThe mode control actuator is located at the heater unit.It adjusts the position of the mode door by operating the mode control actuator based on the signal of the A/C control unit. Pressing the mode select switch makes the mode control actuator shift in order of Vent → Bi-Level → Floor → Mix.
Hyundai Ioniq (AE) 2017-2022 Service & Repair Manual: Intake Actuator. Components and components location
C
Categories
- Manuals Home
- Hyundai Ioniq Owners Manual
- Hyundai Ioniq Service Manual
- What to do in an emergency
- Jump starting procedure
- DCT(Dual Clutch Transmission) System
- New on site
- Most important about car

Copyright © 2026 www.hioniqae.com - 0.0149