Hyundai Ioniq (AE): Rear Door / Rear Door Window Glass. Repair procedures
Hyundai Ioniq (AE) 2017-2022 Service & Repair Manual / Body (Interior and Exterior) / Rear Door / Rear Door Window Glass. Repair procedures
| Replacement |
| 1. | Remove the rear door trim. (Refer to Rear Door - "Rear Door Trim") |
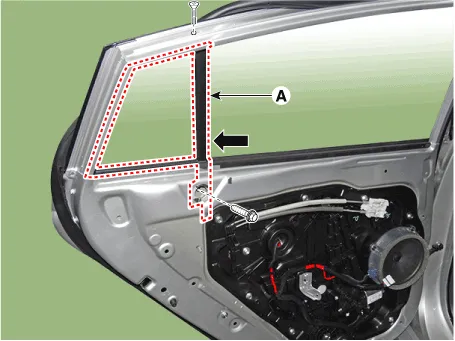
| 2. | Remove the rear door belt inside weatherstrip (A).
|

| 3. | Pull down rear door window glass by pressing the power window glass switch. |
| 4. | Completely loosen the rear door channel mounting bolts and unscrew the loosely as possible without removing them from the rear door panel. |
| 5. | Slightly push the rear door channel (A) in the direction of arrow as below.
|
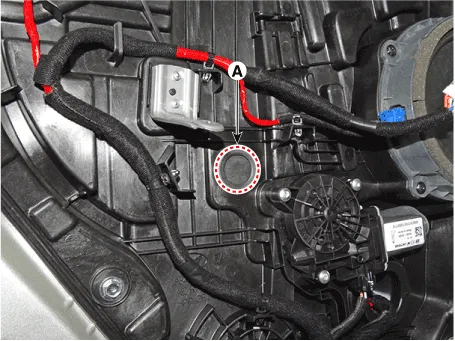
| 6. | Remove the rear door window glass mounting hole plug (A).
|


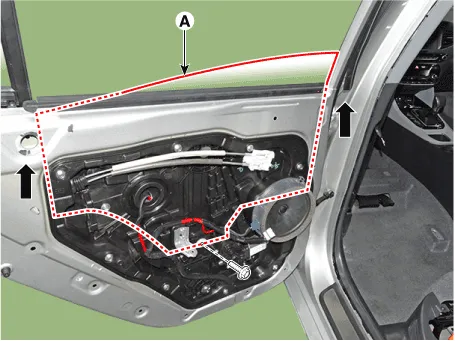
| 7. | Carefully adjust the rear door window glass (A) until the bolts are visible, then loosen them. Separate the glass from the glass run and carefully pull the glass out through the window slot.
|
| 8. | To install, reverse the removal procedure.
|
Component Location 1. Rear door window glass
Component Location 1. Rear door module
Other information:
Hyundai Ioniq (AE) 2017-2022 Service & Repair Manual: Description and operation
DescriptionBlcok DiagramFunctions of Front View CameraFront View Camera supports the following functions using the information (lane, light source, vehicle and pedestrian) detected by the front view camera and the vehicle's signal information (CAN communication).
Hyundai Ioniq (AE) 2017-2022 Service & Repair Manual: Rear Corner Radar Unit. Repair procedures
Removal1.Disconnect the negative (-) battery terminal.2.Remove the rear bumper.(Refer to Body - "Rear Bumper")3.Remove the rear corner radar unit (A) after loosening the mounting nuts. • Take care not to separate the bracket from rear bumper when removing the rear corner radar sensor.
Categories
- Manuals Home
- Hyundai Ioniq Owners Manual
- Hyundai Ioniq Service Manual
- Jump starting procedure
- Brake System
- General Information
- New on site
- Most important about car

Copyright © 2026 www.hioniqae.com - 0.0135