Hyundai Ioniq (AE): Body Side Molding / Rear Wheel Guard. Repair procedures
| Replacement |
|

|

| 1. | Remove the rear tire. |
| 2. | After loosening the mounting screws, clips and nut, remove the rear wheel guard (A).
|
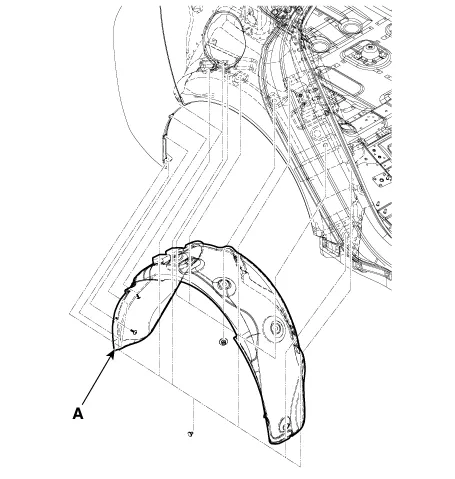
| 3. | To install, reverse the removal procedure.
|

Replacement • Put on gloves to prevent hand injuries. • When removing with a flat-tip screwdriver or remover, wrap protective tape around the tools to prevent damage to components.
Replacement • Put on gloves to prevent hand injuries. • When removing with a flat-tip screwdriver or remover, wrap protective tape around the tools to prevent damage to components.
Other information:
Hyundai Ioniq (AE) 2017-2022 Service & Repair Manual: Ambient Temperature Sensor. Components and components location
C
Hyundai Ioniq (AE) 2017-2022 Service & Repair Manual: General safety information and caution
Safety PrecautionPrecautions To Take Before Servicing High Voltage System • Since hybrid vehicles contain a high voltage battery, if the high voltage system or vehicles are handled incorrectly, this might lead to a serious accidents like electric shock and electric leakage.
Categories
- Manuals Home
- Hyundai Ioniq Owners Manual
- Hyundai Ioniq Service Manual
- Front Disc Brake. Repair procedures
- Maintenance
- Suspension System
- New on site
- Most important about car
