Hyundai Ioniq (AE): Cooling System / Water Temperature Control Assembly. Repair procedures
| Removal and installation |
| 1. | Disconnect the battery negative terminal. |
| 2. | Loosen the drain plug, and drain the engine coolant. Remove the reservoir cap to help drain the coolant faster. (Refer to Cooling System - "Coolant") |
| 3. | Remove the air cleaner assembly. (Refer to Intake and Exhaust System - "Air Cleaner") |
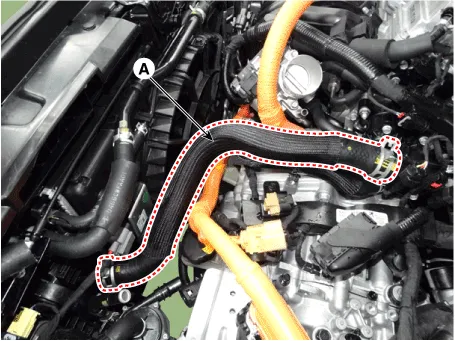
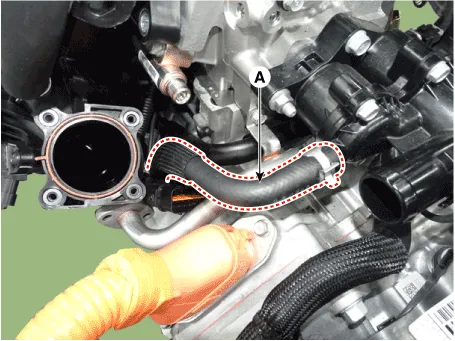
| 4. | Disconnect the radiator upper hose (A).
|

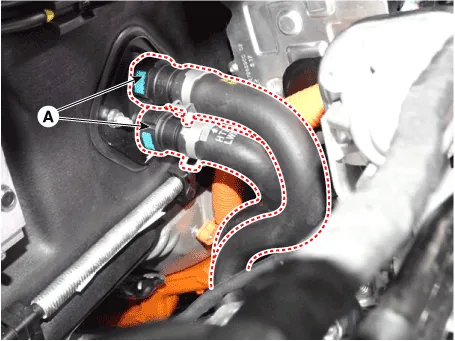
| 5. | Disconnect the heater hoses (A).
|
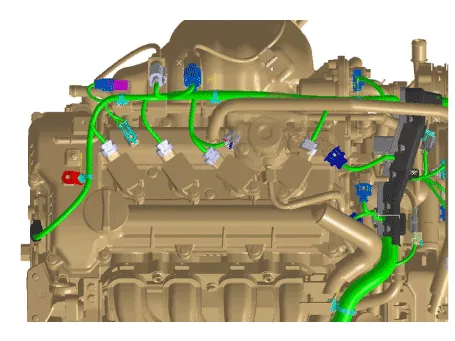
| 6. | Disconnect the wiring connectors and harness clamps and remove the connector brackets around the water temperature control assembly.
|
| 7. | Disconnect the degassing hose (A) and EGR cooler hose (B).
|

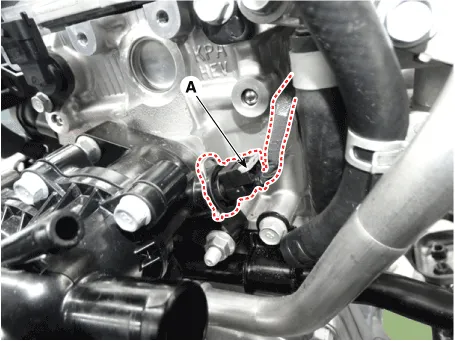
| 8. | Disconnect the oil cooler hose (A).
|
| 9. | Disconnect the water temperature sensor connector (A).
|
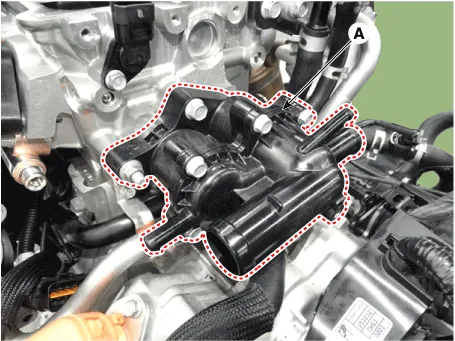
| 10. | Remove the water temperature control assembly (A).
|

| 11. | Install in the reverse order of removal. |
| 1. | Disconnect the battery negative terminal. |
| 2. | Loosen the drain plug, and drain the engine coolant. Remove the reservoir cap to help drain the coolant faster. (Refer to Cooling System - "Coolant") |
| 3. | Remove the air cleaner assembly. (Refer to Intake and Exhaust System - "Air Cleaner") |
| 4. | Remove the water temperature control assembly. (Refer to Cooling System - "Water Temperature Control Assembly") |
| 5. | Remove the intake manifold. (Refer to Intake and Exhaust System - "Intake Manifold") |
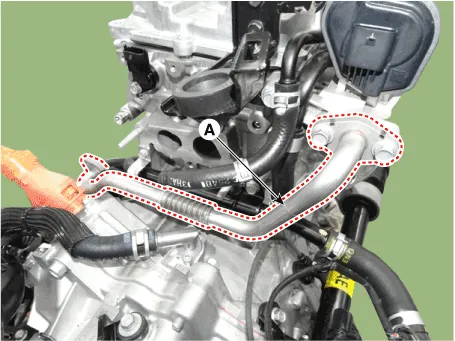
| 6. | Remove the electric EGR control valve cooler pipe (A).
|
| 7. | Remove the heater pipe (A).
|

| 8. | Install in the reverse order of removal. |
| 9. | Fill the radiator with coolant and check for leaks. (Refer to Cooling System - "Coolant") |
| 10. | Start engine and check for leaks. |
| 11. | Recheck the coolant level. |
| Inspection |
| 1. | Remove the outlet fitting, coolant temperature sensor, bracket and gasket from the coolant temperature control assembly. |
| 2. | Submerge the coolant temperature control assembly with the thermostat in the antifreeze and heat the antifreeze slowly.
|
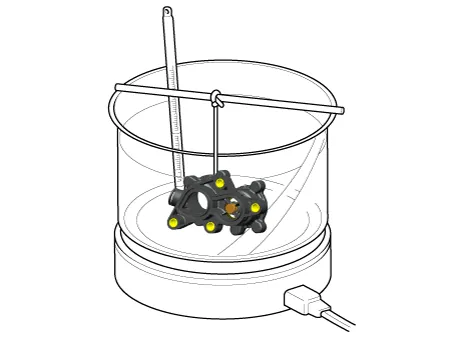
| 3. | Check the valve opening temperature.
If the valve opening temperature is not as specified, replace the thermostat. |
| 4. | Check the valve lift.
If the valve lift is not as specified, replace the thermostat. |
Components1. Water temperature control (WTC) outlet fitting2. Water temperature control (WTC) housing3. Water temperature control (WTC) gasket4. Water temperature control (WTC) outlet fitting gasket5.
Components1. Water pump pulley2. Water pump3. Gasket
Other information:
Hyundai Ioniq (AE) 2017-2022 Service & Repair Manual: Auto Defoging Actuator. Description and operation
DescriptionThe auto defogging sensor is installed on front window glass. The sensor judges and sends signal if moisture occurs to blow out wind for defogging. The air conditioner control module receives a signal from the sensor and restrains moisture and eliminates defog by the intake actuator, A/C, auto defogging actuator, blower motor rpm and mod
Hyundai Ioniq (AE) 2017-2022 Service & Repair Manual: Description and operation
Cruise ControlThe cruise control system is engaged by the cruise "ON/OFF" main switch located on right of steering wheel column. The system has the capability to cruise, coast, accelerate and resume speed.It also has a safety interrupt, engaged upon depressing brake or shifting select lever.
Categories
- Manuals Home
- Hyundai Ioniq Owners Manual
- Hyundai Ioniq Service Manual
- Checking the Coolant Level
- General Information
- If the 12 Volt Battery is Discharged (Hybrid Vehicle)
- New on site
- Most important about car
