Hyundai Ioniq (AE): Engine and Transaxle Assembly / Engine Mounting. Repair procedures
| Removal and Installation |
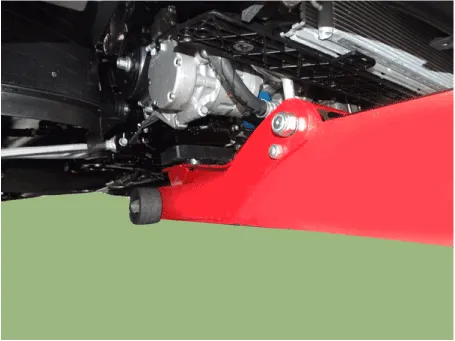
| 1. | Remove the roll rod bracket (A).
|

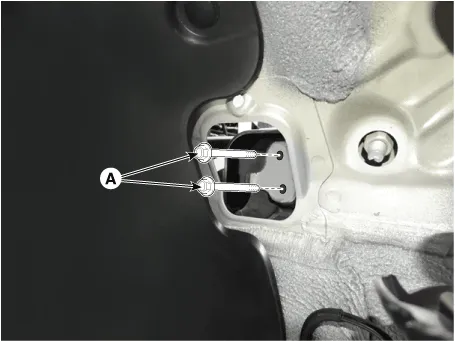
| 2. | Remove the roll rod mounting support bracket (A).
|
| 3. | Install in the reverse order of removal. |
| 1. | Remove the engine room under cover. (Refer to Engine and Transaxle Assembly - "Engine Room Under Cover") |
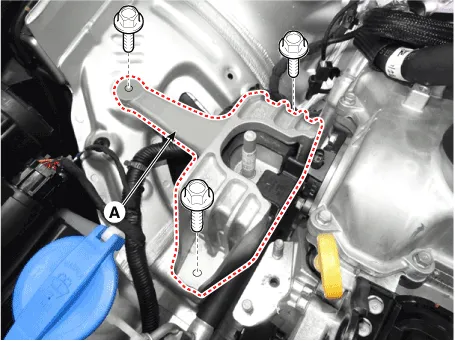
| 2. | Install the jack to the edge of oil pan to support the engine.
|

| 3. | Remove the engine mounting support bracket (A).
|
| 4. | Remove the reservoir tank. (Refer to Cooling System - "Reservoir Tank") |
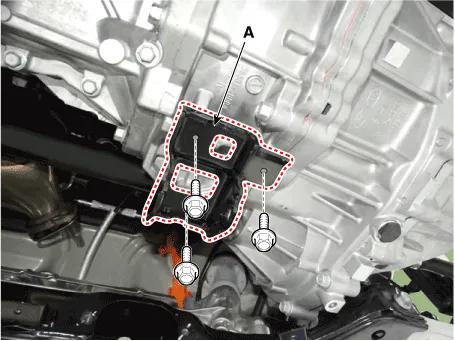
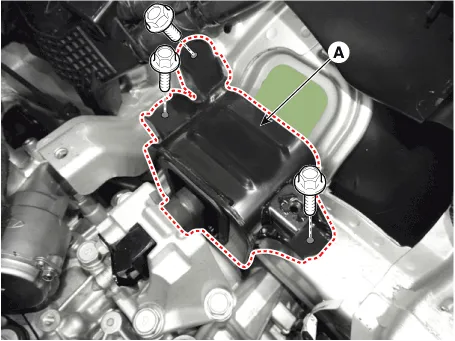
| 5. | Remove the engine mounting bracket (A).
|
| 6. | Install in the reverse order of removal. |
|

| 1. | Shut off the High Voltage circuit. (Refer to General Information - "High Voltage Shutoff Procedure") |
| 2. | Disconnect the battery negative terminal. |
| 3. | Remove the engine room under cover. (Refer to Engine and Transaxle Assembly - "Engine Room Under Cover") |
| 4. | Loosen the drain plug, and drain the inverter coolant. Remove the reservoir cap to help drain the coolant faster. (Refer to Hybrid Motor System - "Coolant") |
| 5. | Remove the air cleaner assembly. (Refer to Intake and Exhaust System - "Air Cleaner") |
| 6. | Remove the hybrid power control unit (HPCU). (Refer to Hybrid Control System - "Hybrid Power Control Unit (HPCU)") |
| 7. | Remove the engine control module (ECM) and DCT control module (TCM). (Refer to Engine Control / Fuel System - "Engine Control Module (ECM)") (Refer to Double Clutch Transmission (DCT) System - "DCT Control Module (TCM)") |
| 8. | Remove the hybrid power control unit (HPCU) tray. (Refer to Hybrid Control System - "Hybrid Power Control Unit (HPCU)") |
| 9. | Install the jack under the transaxle to support it. |
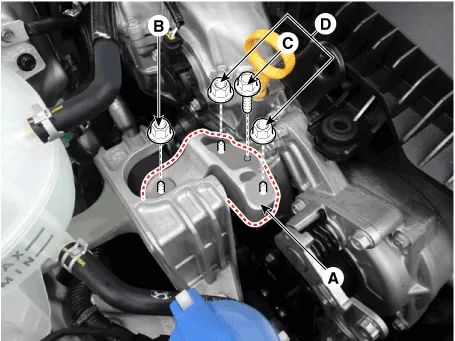
| 10. | Remove the service cover (A).
|

| 11. | Remove the transaxle support bracket mounting bolts (A).
|
| 12. | Remove the transaxle mounting bracket (A).
|
| 13. | Install in the reverse order of removal. |
Components1. Transaxle mounting bracket2. Roll rod bracket3. Engine mounting bracket4. Engine mounting support bracket
Removal • Be sure to read and follow the "General Safety Information and Caution" before doing any work related with the high voltage system.
Other information:
Hyundai Ioniq (AE) 2017-2022 Service & Repair Manual: In-car Sensor. Repair procedures
Diagnosis With GDS1.The heating, ventilation and air conditioning can be quickly diagnosed failed parts with vehicle diagnostic system (GDS).※ The diagnostic system (GDS) provides the following information.(1) Self diagnosis : Checking the failure code (DTC) and display.
Hyundai Ioniq (AE) 2017-2022 Service & Repair Manual: emperature Control Actuator. Repair procedures
Inspection1.Turn the ignition switch OFF.2.Disconnect the temperature control actuator connector.3.Verify that the temperature control actuator operates to the cool position when connecting 12V to terminal 3 and grounding terminal 7.Verify that the temperature control actuator operates to the warm position when connected in reverse.
Categories
- Manuals Home
- Hyundai Ioniq Owners Manual
- Hyundai Ioniq Service Manual
- Washer Fluid
- Engine Mechanical System
- Child-Protector Rear Door Locks
- New on site
- Most important about car
